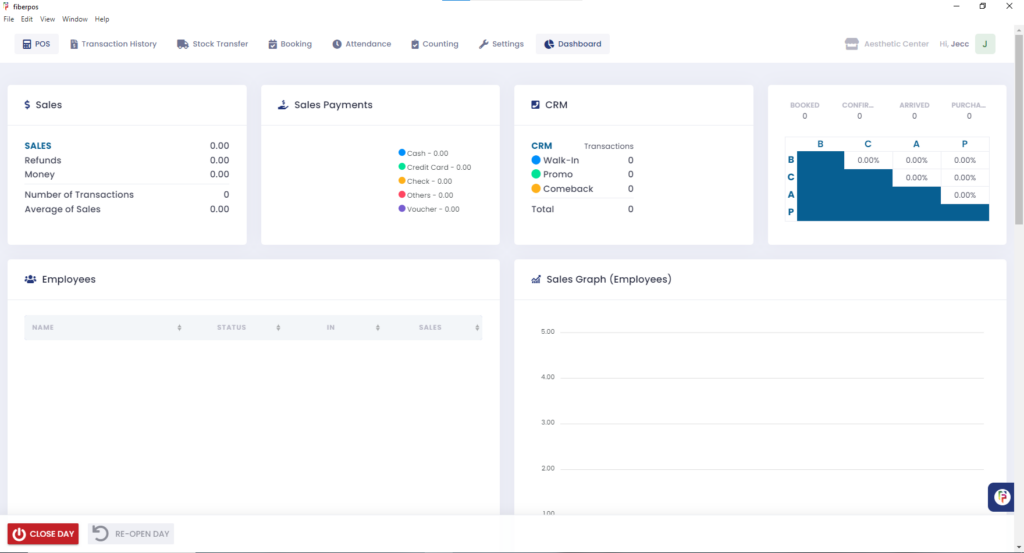
1. Upon successfully logging into the system, Navigate to “POS” tab located in the top left menu bar.
2. Once in the POS section, choose the brand associated with the products the client wants to purchase.

3. After selecting the brand, click the relevant product category. Use the category menu to locate products more effectively, considering that some brands may have multiple categories.

4. To locate a specific product, you can browse manually by scrolling or you can browse it by using the search or barcode search options below the categories. This function is especially useful for quick access if the client is purchasing multiple items.
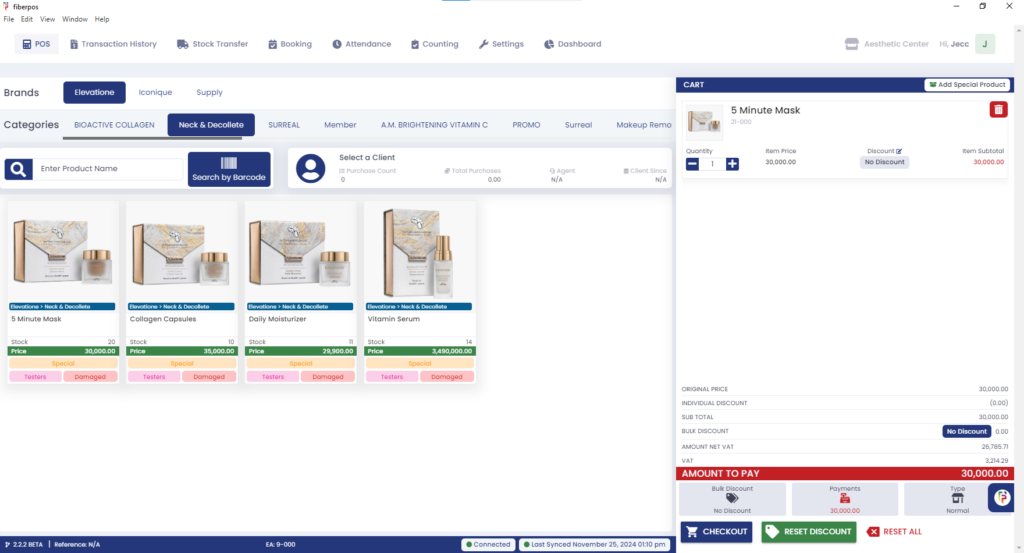
*To add multiple products, repeat the previous steps for each item, navigating through the appropriate brand and category as needed.
Applying Discounts
- Per-item discounts
- Bulk discounts
Applying Discounts per-item (if available)
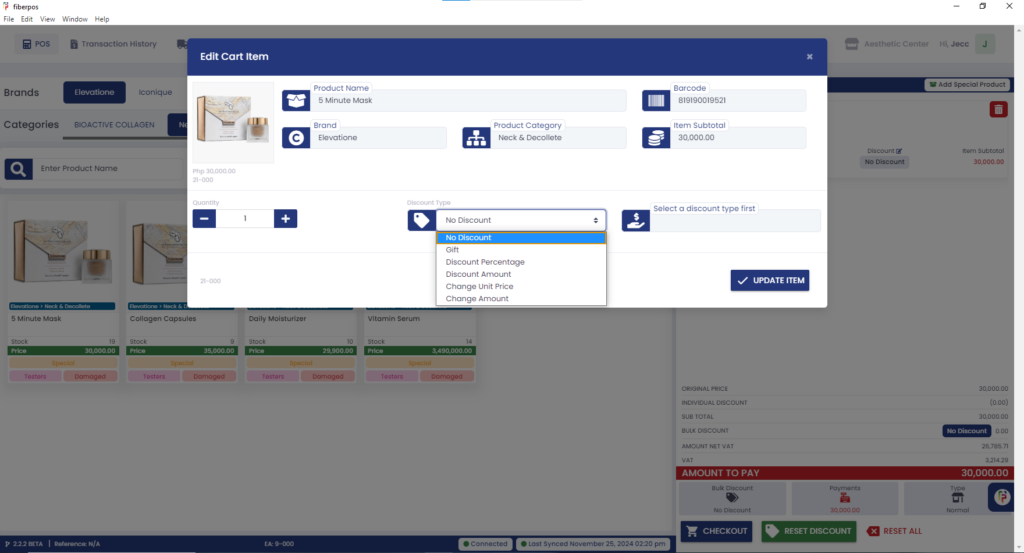
5. To apply a discount per item, in the cart tab locate the item or the product. Click the Discount.
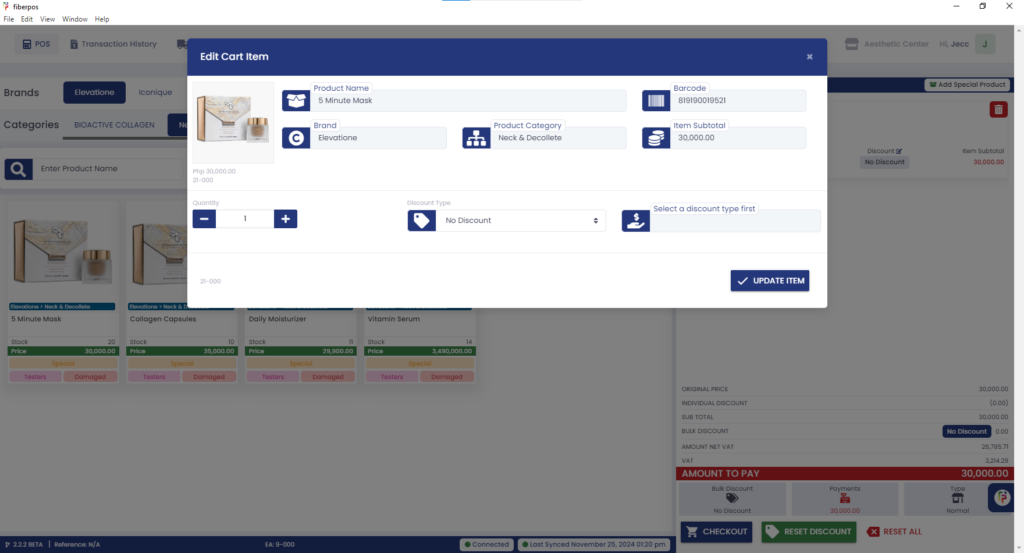
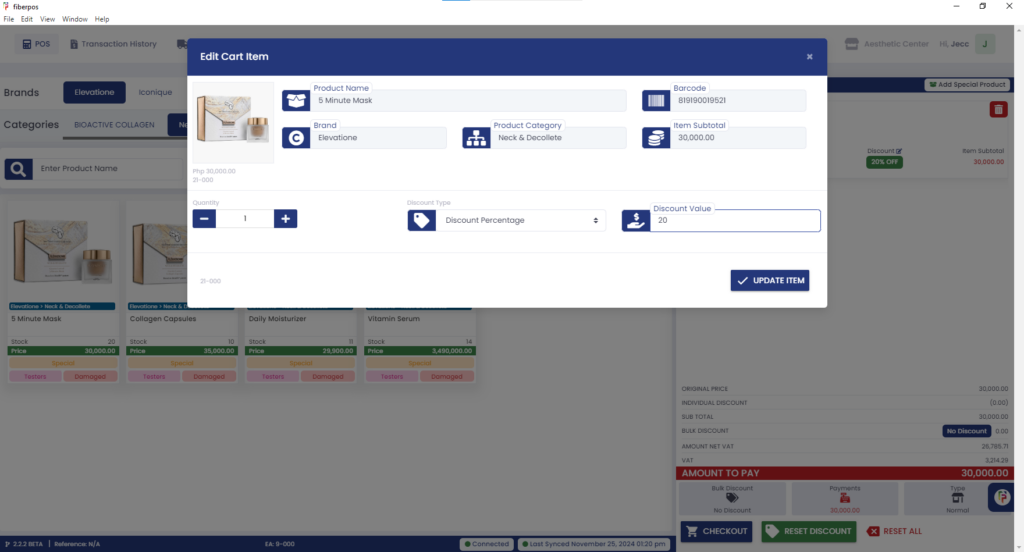
6. Then click the Discount Type and select what type of discount is applicable. After selecting what type of discount, enter the discount value and click the update item to apply the discount.
Applying Bulk Discounts
7. To apply a bulk discount for all items, scroll to the bottom of the cart under the “AMOUNT TO PAY” section. Here, select the discount option to apply a collective discount.
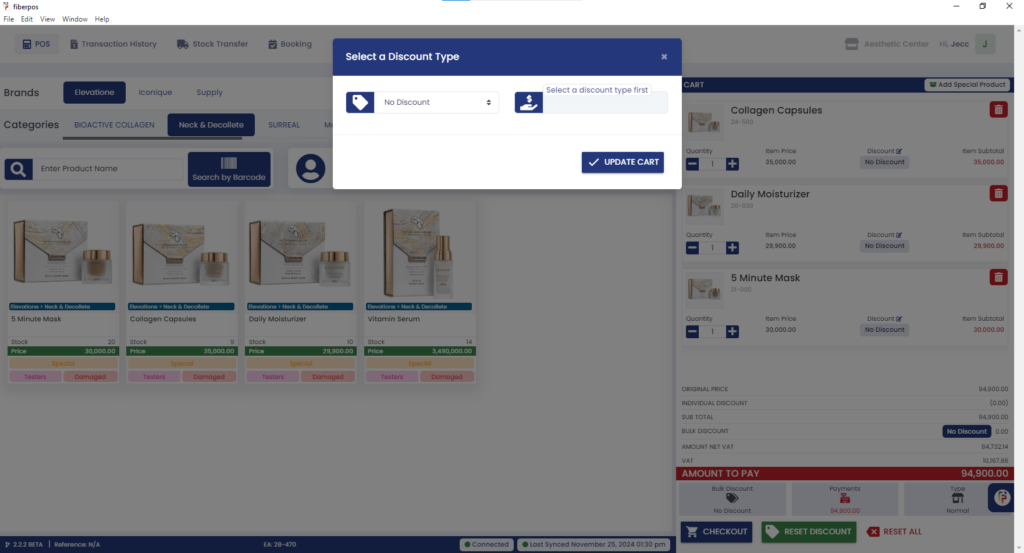
8. Select what type of discount is applicable. After selecting what type of discount, enter the discount value and click the update cart to apply the discount.
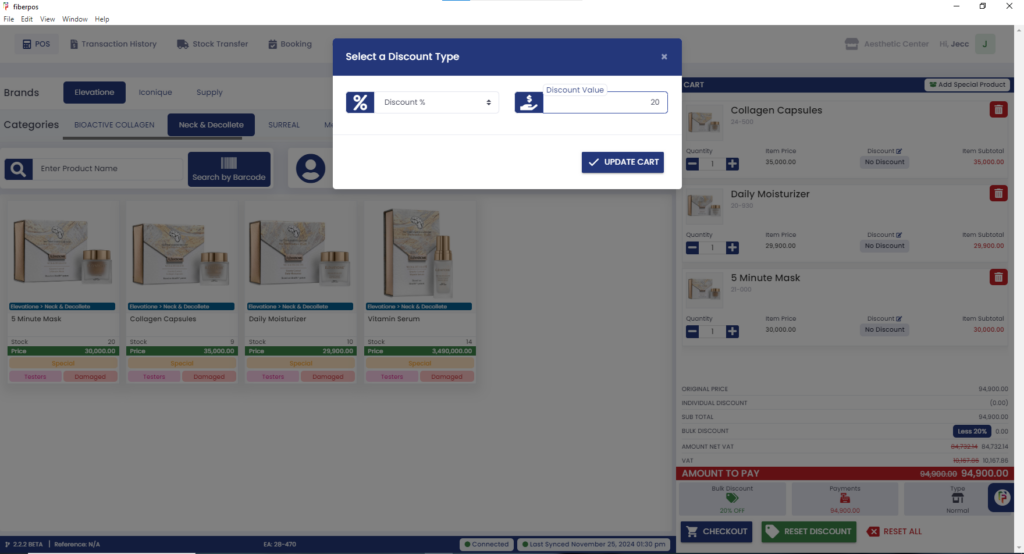
9. After applying a discount (per item or bulk), scroll to the bottom of the cart under the
“AMOUNT TO PAY” section. Click the “CHECKOUT” button to proceed on payments.
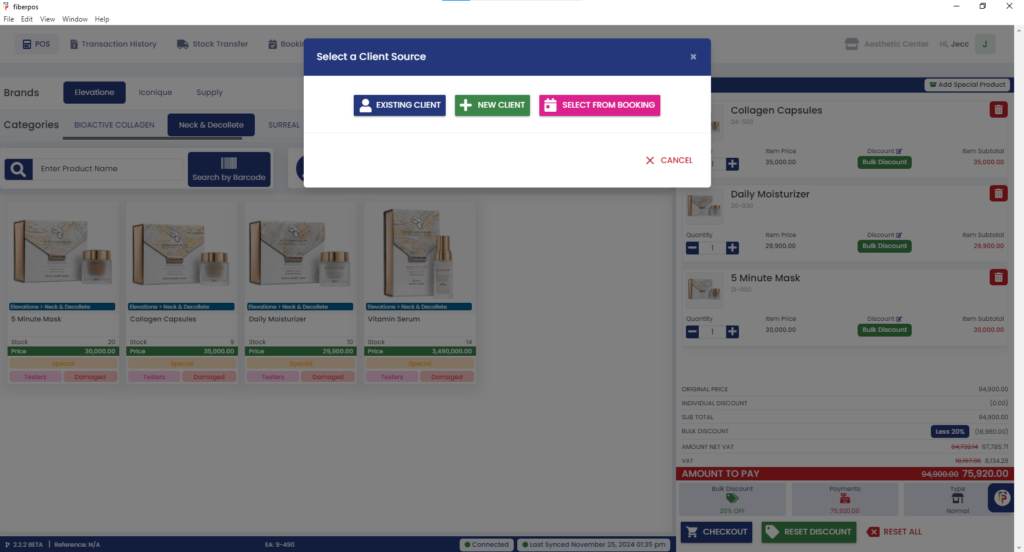
10. In this section, you will choose whether if the client is Existing, New, or you can select from booking section.
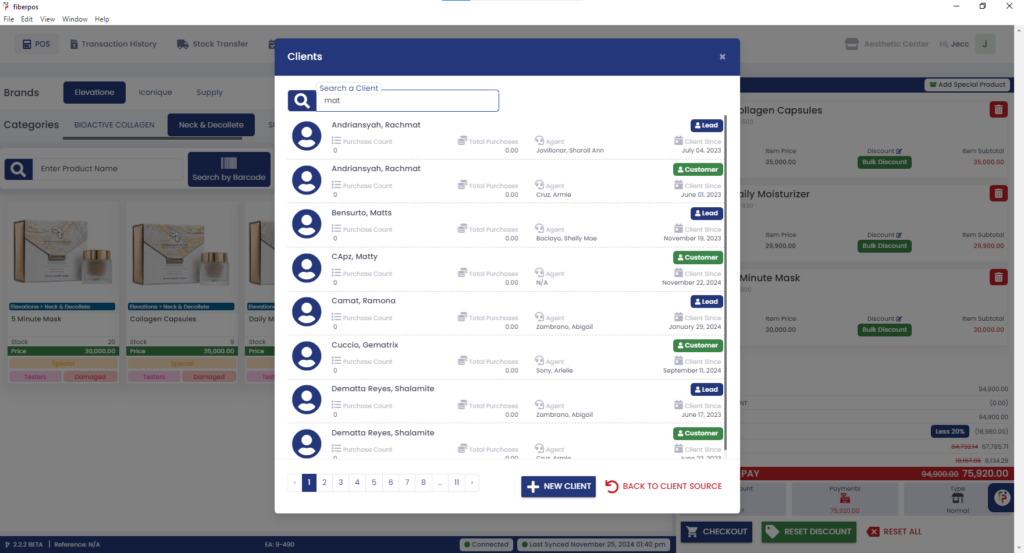
For the Existing Client, a search window will appear. Type in at least three(3) characters to activate the automatic search feature.
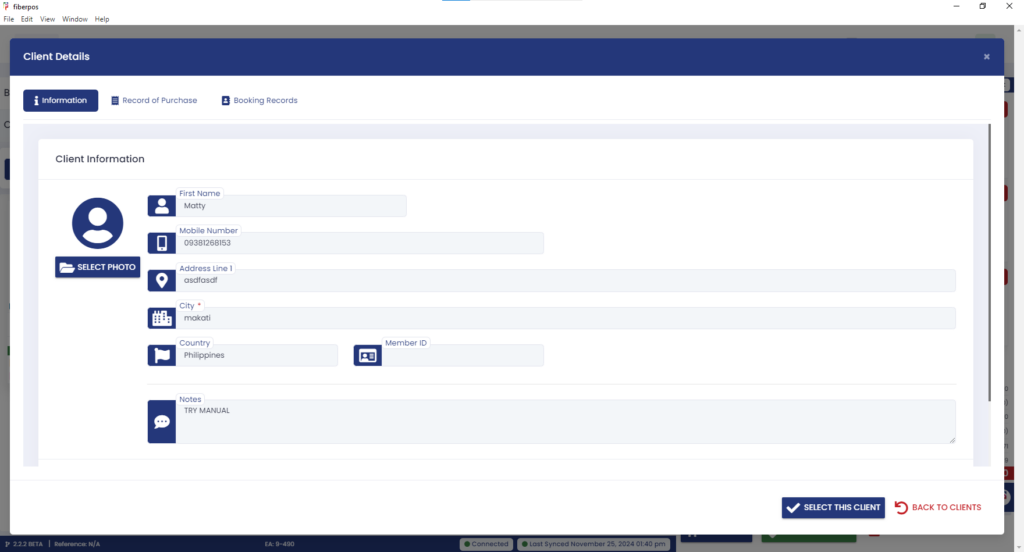
After finding the client, just click on it and click the “SELECT THIS CLIENT” button to proceed on payments.
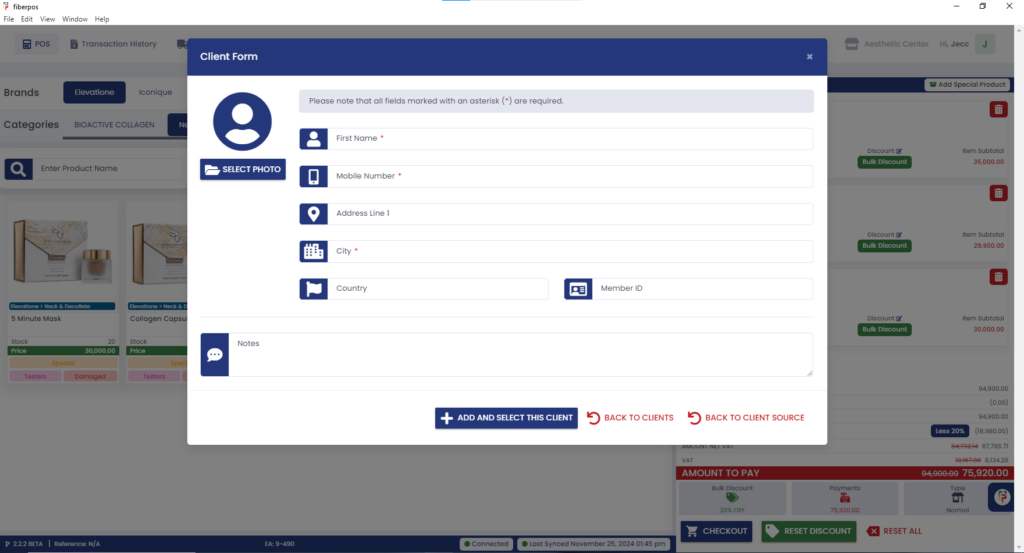
For the New Client, fill out the form with the necessary client information. After inputting all the necessary details, just click the “ADD AND SELECT THIS CLIENT” button to proceed on payments.
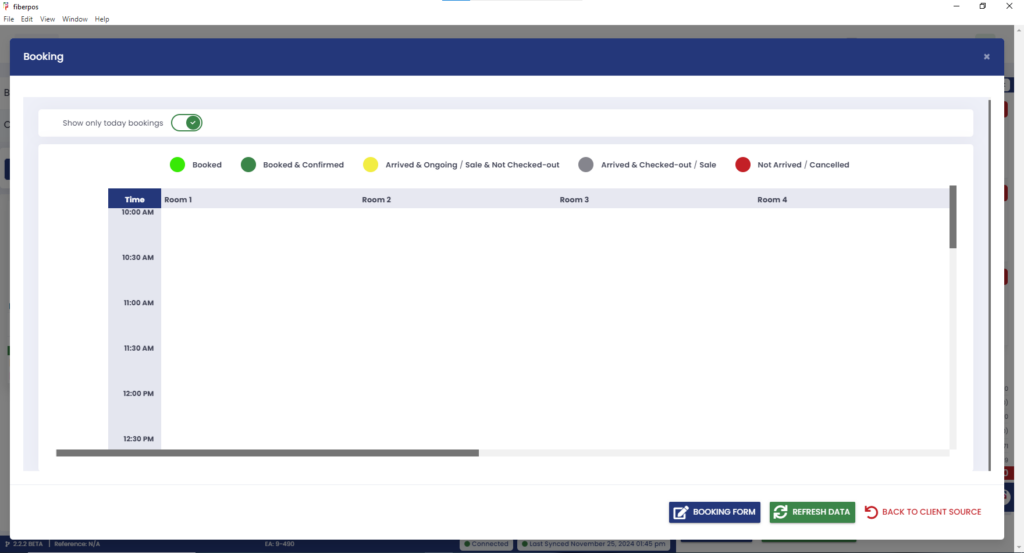
From the Booking Section, the booking schedule for the day will pop up. The option “Show Only Today’s Bookings” will be automatically selected. This allows you to view appointments scheduled for the current day. Select the client from the booking and it will proceed on the payments.
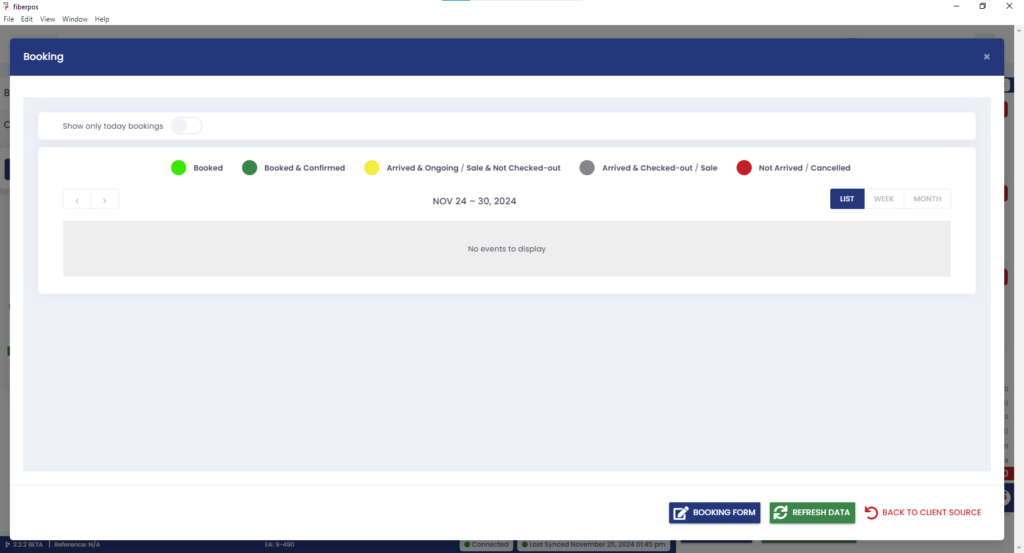
To view bookings for other days, deselect the “Show Only Today’s Bookings” checkbox. This will enable you to see appointments scheduled for other dates. Additionally, you can choose your preferred viewing mode by selecting one of the following options: List, Week, or Month. Select the client from the booking and it will proceed on the payments.
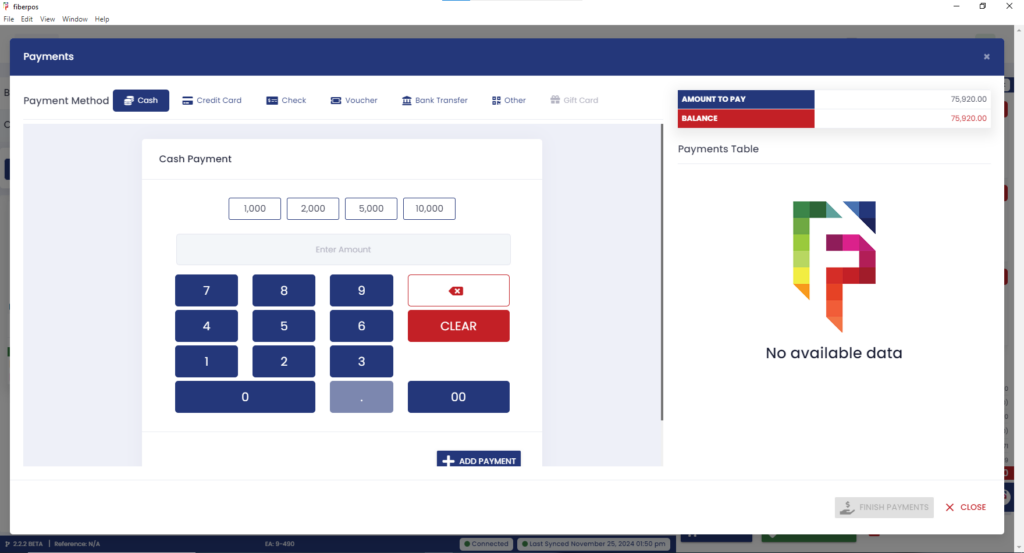
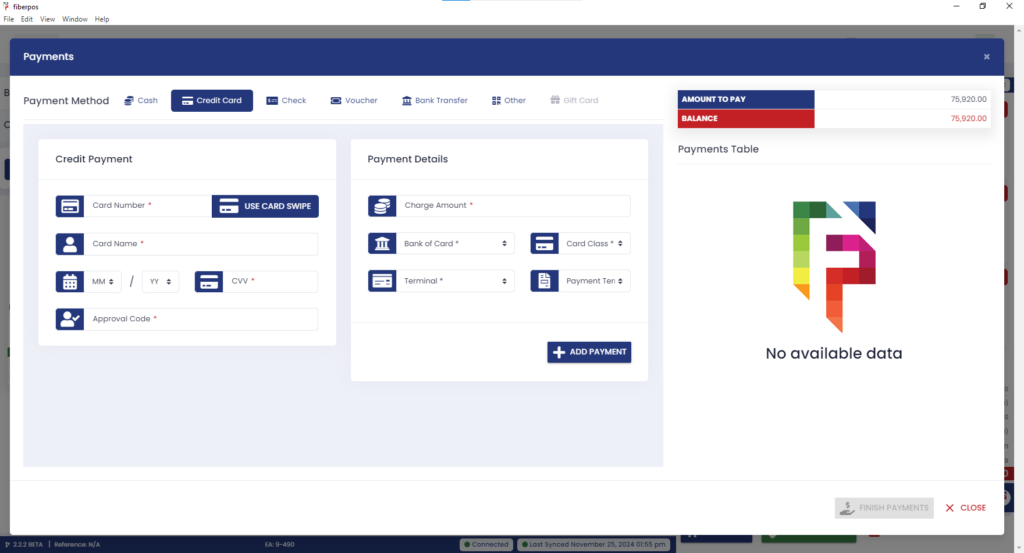
11. Once the client is confirmed, the Payments window will open, displaying the following payment methods: Cash, Credit Card, Check, Voucher, Bank Transfer, Other
Payment Details for each method
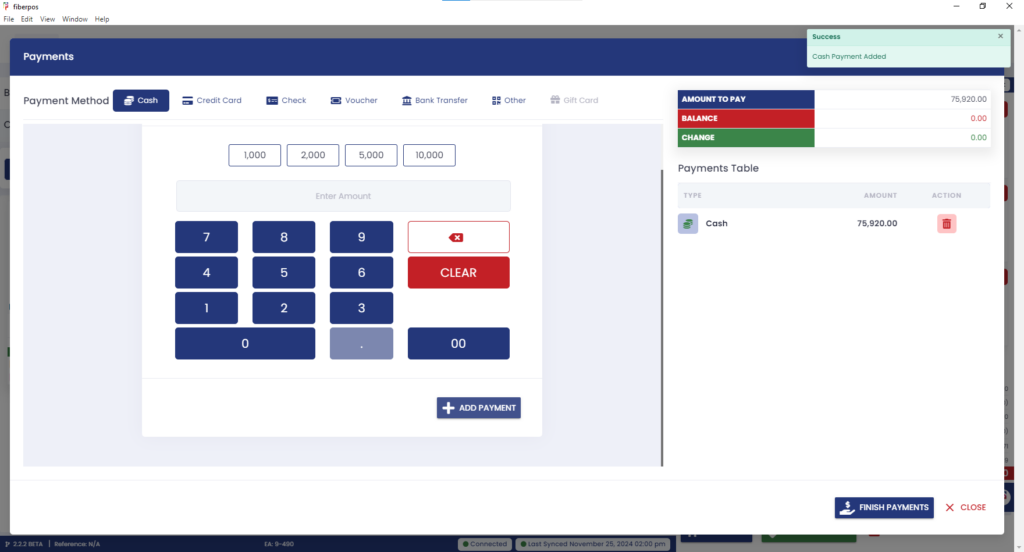
- Cash – Input the amount using the on-screen number pad or pre-setdenominations (e.g., 1,000, 2,000, 5,000, 10,000). Ensure the total matches the purchase amount and is added to the PAYMENTS TABLE. Click FINISH PAYMENTS to finalize.
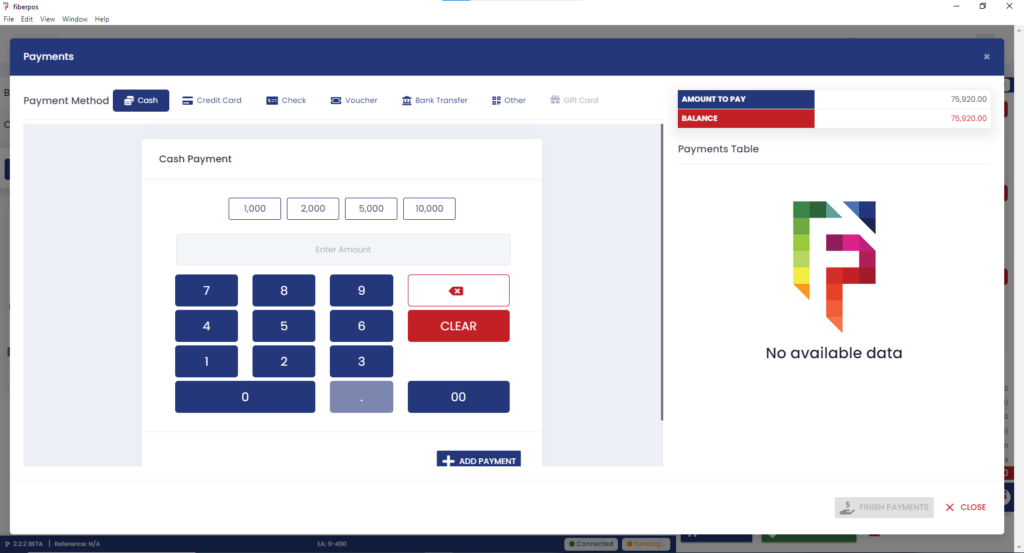
- Credit Card – Click the CREDIT CARD tab and fill in card details or swipe if the terminal supports it. Fill in the Payment Details, including Bank of Card, Card Class, Terminal, and Payment Terms. Confirm details and click Add Payment.
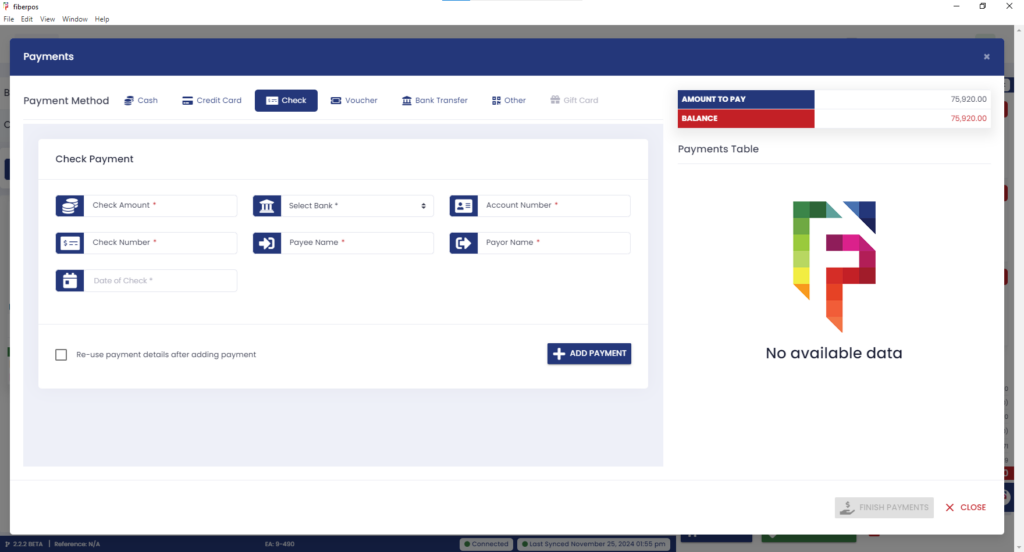
- Check – Select Check and fill in check details. Confirm all information and add to the PAYMENTS TABLE.
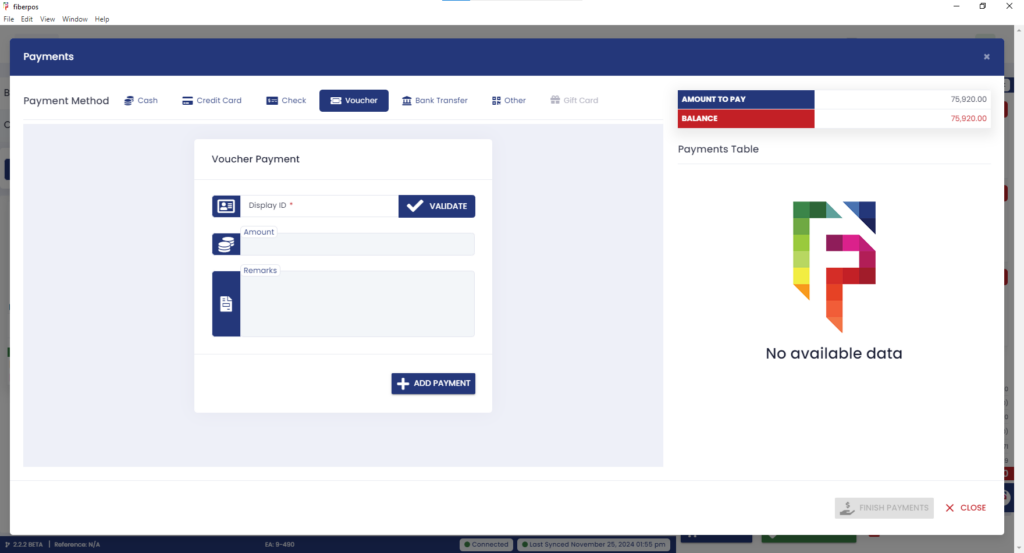
- Voucher – Enter voucher Display ID and validate. Once validated, add the amount and remarks, then confirm by adding to the PAYMENTS TABLE.
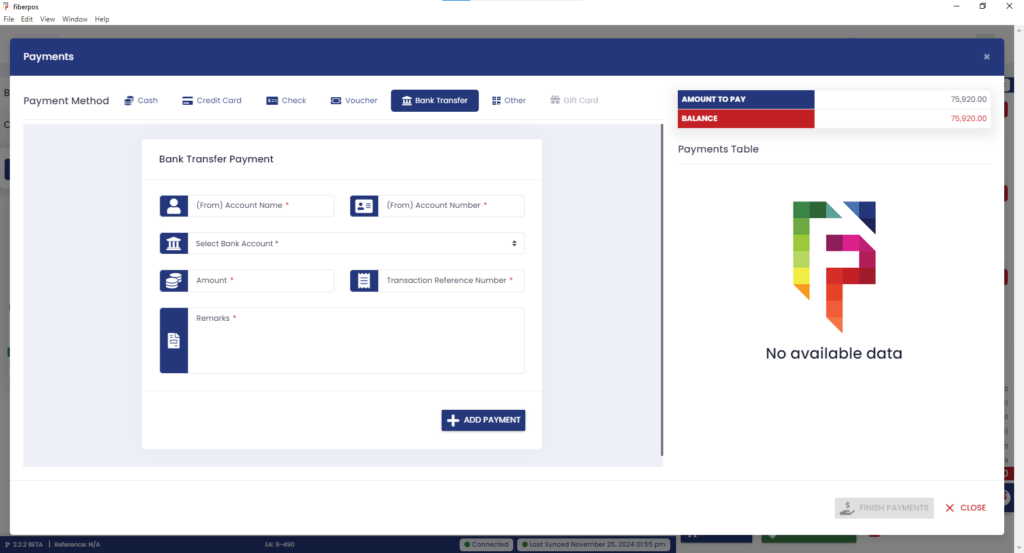
- Bank Transfer – Choose Bank Transfer, fill out the required fields, then click Add Payment.
- Other – Choose Other, fill out the required fields, then click Add Payment.
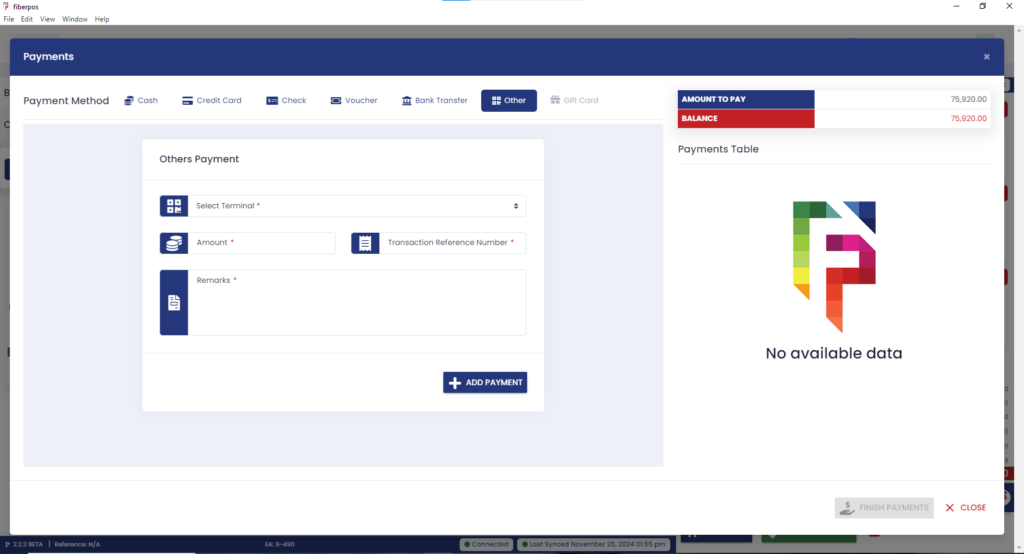
12. After choosing what payment method, for example the client chose Cash. After adding the payment, it will notify that the cash payment is added.
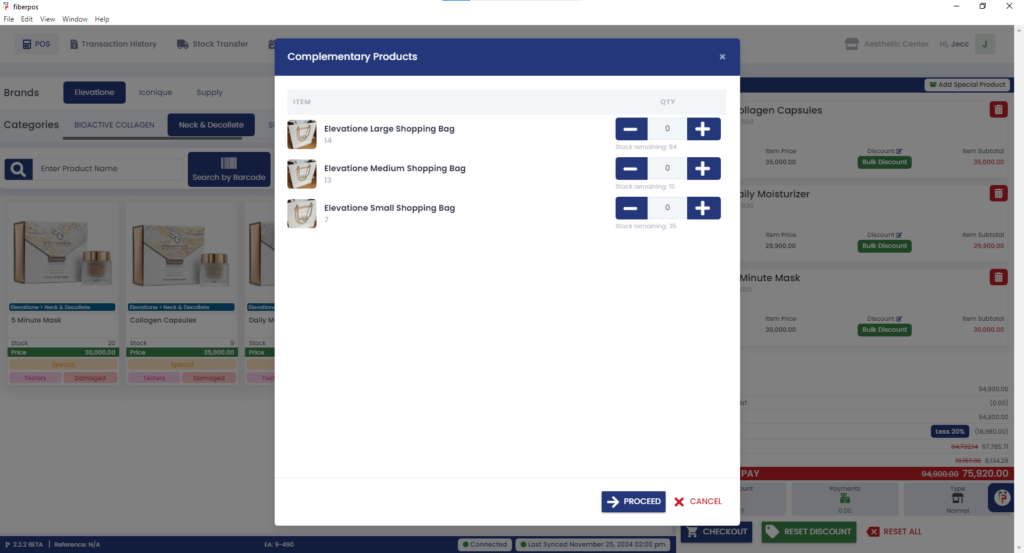
13. After FINISH PAYMENT, a window will appear for complementary items, such as bags or holders, provided at no cost. Select the number of necessary items by pressing add or subtract to the “QTY” and proceed.
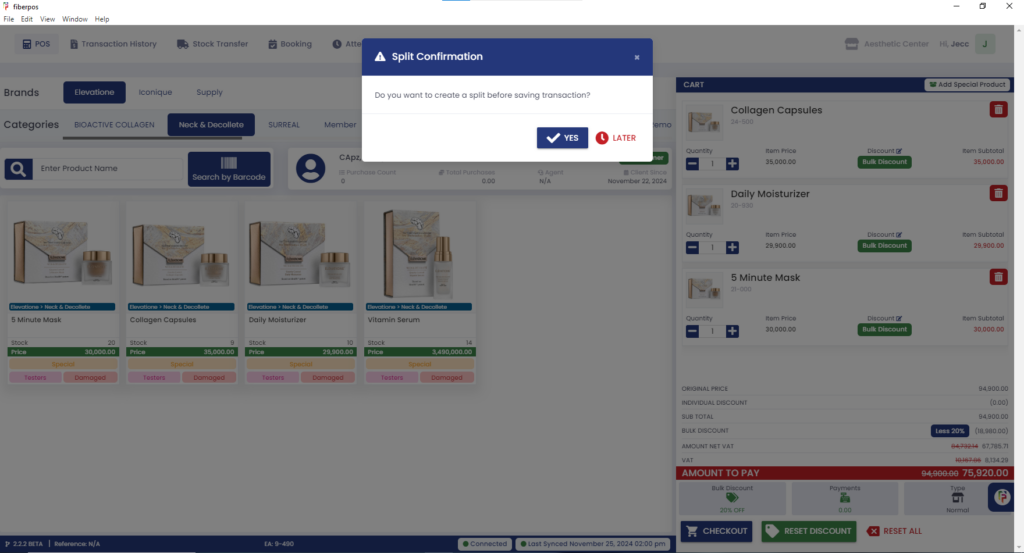
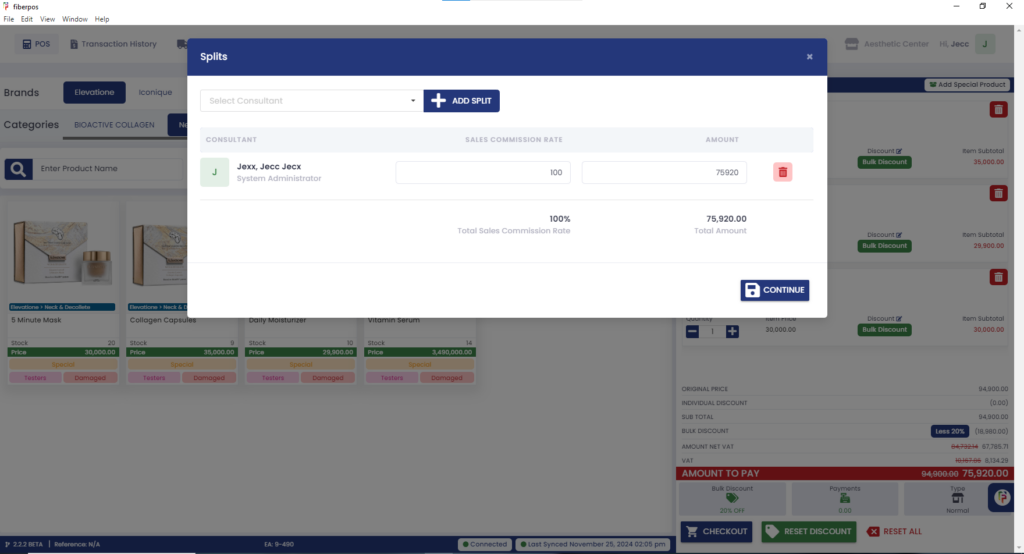
14. A confirmation prompt for splitting commissions among consultants will appear. Select “Yes” or “Later.” If choosing “Yes,” search for the consultant(s) and allocate the division of commission as appropriate.
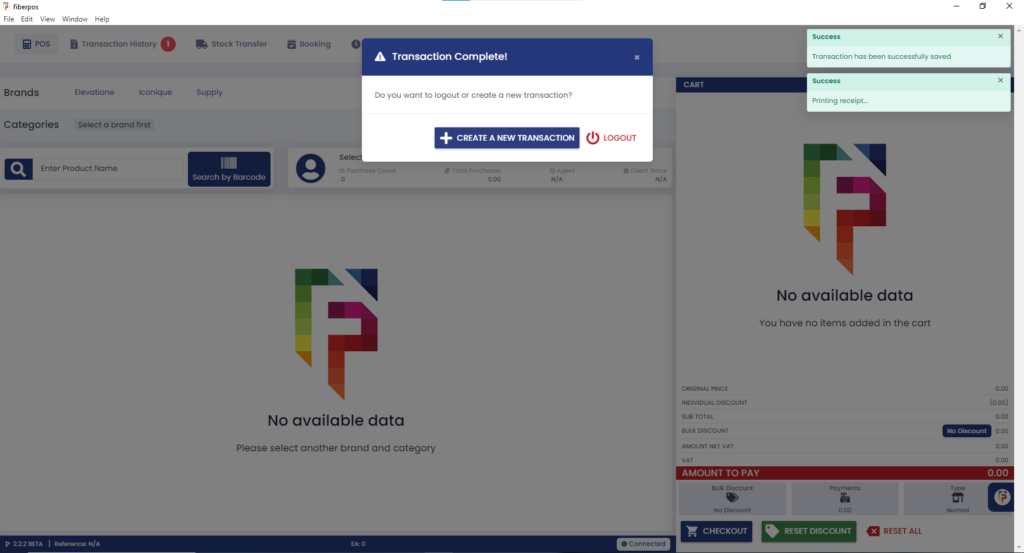
15. Choose CREATE A NEW TRANSACTION or Log Out to close your session.
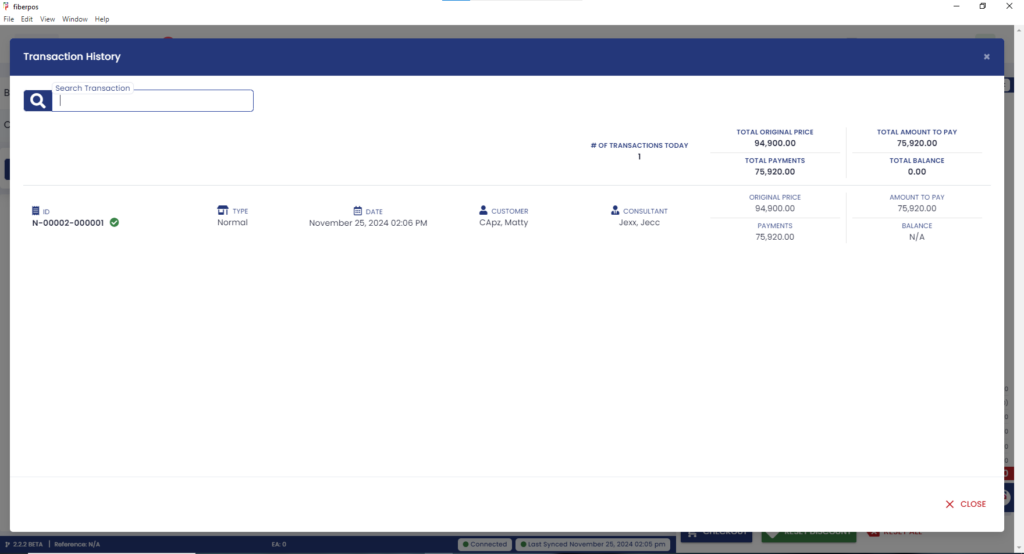
16. Completed transactions can be viewed in the Transaction History tab, with the most recent transaction displayed at the top.
